
If your sewing machine has started making strange noises, skipping stitches, or feeling a little sluggish, it might not be a fault, it could simply be time for a bit of TLC. Just like any hardworking tool, sewing machines need regular cleaning and maintenance to keep them running smoothly. Yet many makers aren’t quite sure when or how often to clean and oil their machine, especially with different models requiring different care.
In this guide, we’ll walk you through how to set a simple cleaning and oiling routine based on your machine type. We’ll also clarify a common misconception: not all machines need oiling, particularly those with drop-in bobbin cases that are already greased at the factory. Plus, we’ll touch on a vital habit often overlooked by beginners and experienced sewers alike: changing your needle regularly. A little attention between projects can help prevent bigger issues later on.
Understanding Your Machine’s Needs
Drop-In Bobbin Case Machines vs Others
Not all sewing machines require the same maintenance routine; especially when it comes to oiling. If you have a machine with a drop-in bobbin case, it’s important to know that these models are typically pre-greased at the factory. They’re designed to run without the need for additional oil, and adding oil where it’s not needed can actually do more harm than good. In fact, using oil on greased components can dry out or break down the manufacturer’s lubricant, potentially affecting the performance of your machine.
Instead, focus on keeping these machines clean. Regular lint removal is key, particularly around the feed dogs and bobbin area. If your manual ever mentions grease, be sure to use only grease recommended or supplied by the manufacturer, rather than a generic substitute.
When Oil Is Necessary
For machines that do require oil, such as those with rotary or oscillating hook systems, light oiling can prevent wear on metal components. These models usually benefit from a drop of sewing machine oil at key contact points, especially after heavy use. If you’re unsure whether your machine falls into this category, a quick look at your user manual or a chat with a technician will confirm what’s best for your specific model.
Getting familiar with how your machine is built will help you make the right call, and protect your investment for years to come.
Cleaning Your Machine and How Often Is Enough?
Quick Clean Between Projects
Even light use can cause lint and thread fragments to build up under the needle plate and around the bobbin area. A quick clean after every project, or every few hours of sewing, goes a long way in keeping your machine running smoothly. This is especially important if you’re working with fabrics that shed a lot, like brushed cotton or fleece.
What to clean:
- The bobbin case and surrounding area
- The feed dogs (use a small brush, not compressed air)
- The needle plate, unscrew and lift it off to get underneath
It only takes five minutes, but it can prevent hours of frustration later.
Weekly Maintenance for Regular Use
If you’re sewing daily or working on a large project, aim for a more thorough clean once a week. Remove the needle plate and take time to clean any lint trapped deeper in the machine. For those sewing with metallic threads, wadding, or high-lint materials, cleaning more frequently is a smart habit.
Don’t Forget an Annual Service
Even with good habits at home, your sewing machine will benefit from a professional service roughly once a year. This gives a technician the chance to check internal parts, adjust timing if needed, and reapply grease or oil in areas you can’t access.
How Often and How Much for Oiling?
If Your Machine Needs Oil
For machines that aren’t pre-greased (such as many mechanical or older models), occasional oiling keeps metal parts moving freely and prevents wear over time. A good rule of thumb is to apply a drop of sewing machine oil:
- After every 2 to 3 full bobbin changes
- After several hours of continuous use
- Anytime the machine sounds louder or feels sluggish
Stick to sewing machine oil only and never use general-purpose household oils, which can clog or damage your machine.
Less Is More
When oiling, a little goes a long way. Apply just one drop at each recommended point (check your manual for specifics), and always wipe away any excess with a lint-free cloth. Over-oiling can attract dust and fibres, undoing your good work.
If you’re oiling the bobbin race or hook area, run a few stitches on scrap fabric afterwards, as this helps spread the oil evenly and removes any residue. Keep it clean, light, and precise, and your machine will thank you with quieter, smoother sewing.
Cleaning & Oiling Step-by-Step Guide
If you’re unsure where to start, here’s a simple routine you can follow, with no special tools required, just a few minutes and a clean workspace.

5-step visual guide for cleaning and oiling a sewing machine
Step 1: Unplug Your Machine
Safety first. Always turn off and unplug your machine before doing any maintenance.
Step 2: Remove the Needle Plate & Bobbin Case
Use a small screwdriver to lift the plate and take out the bobbin and case. Keep the screws safe so they don’t roll off mid-clean.
Step 3: Brush Away Lint
Use a small lint brush (often included with your machine) to gently clean around:
- The feed dogs
- The bobbin area
- Any visible lint inside the hook race
Avoid using canned air, which can push debris further inside the machine.
Step 4: Oil if Required
If your model needs oil:
- Add a single drop to the hook race (check your manual for the right spots)
- Wipe away any excess
- Never oil plastic or electronic parts
Step 5: Reassemble and Test
Put everything back together, insert a new needle (more on that in a moment), and stitch a few lines on scrap fabric. This helps distribute the oil and check that everything’s working smoothly.
Taking the time to do this after every few projects will improve your stitching results and extend your machine’s life significantly.
Don’t Forget the Needle
While cleaning and oiling get most of the attention, changing your needle regularly is just as important for smooth, consistent stitching. A worn or slightly bent needle might still look fine, but it can cause skipped stitches, uneven tension, or even damage to your fabric and machine.
When to Change Your Needle
As a general rule, you should replace your needle:
- After every 6 hours of sewing
- At the end of each project
- If you hear a slight popping sound as the needle enters the fabric
- When switching fabric types (e.g. from cotton to denim)
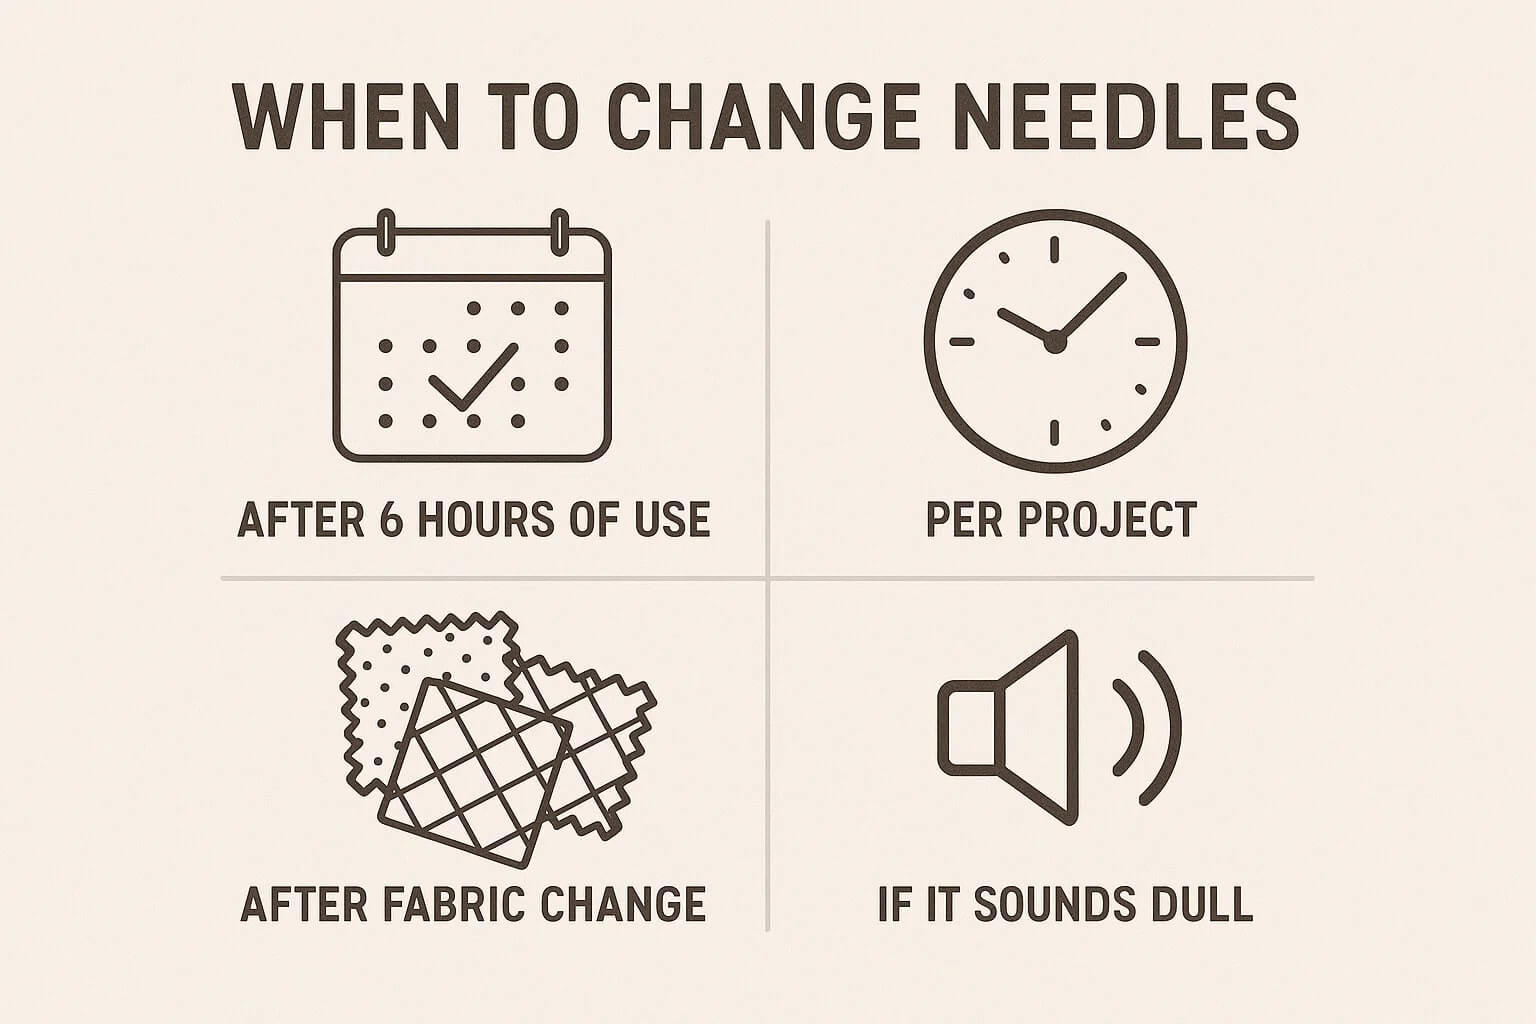
Reminder chart showing when to change your sewing needle
Using a fresh needle helps your machine run more quietly and protects your materials from unnecessary snags or holes.
Why We Recommend Schmetz Needles
We recommend Schmetz needles for their consistent quality and reliability. They’re colour-coded by type and size, which makes it easy to pick the right one for your project, whether you’re quilting, dressmaking, or sewing with stretch. For such a small part, the difference a good needle makes is hard to overstate.
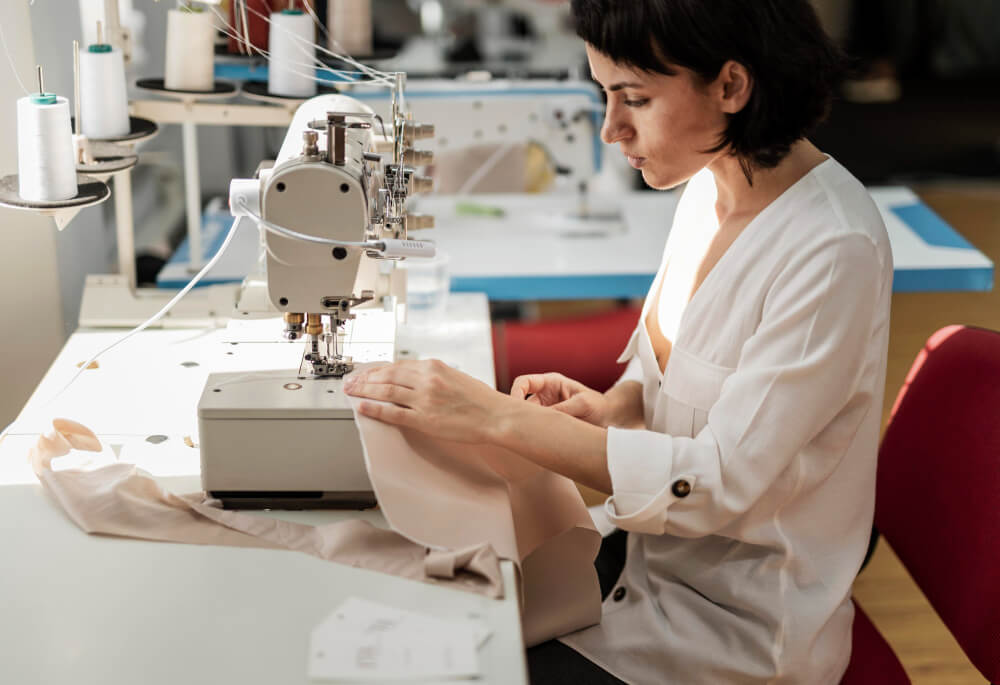
Keeping your sewing machine in good working order can make all the difference when producing various garments
Keep Your Machine Running Smoothly
A little regular care goes a long way in keeping your sewing machine at its best. Clean out lint between projects, oil only where recommended, and always use the right products. Whether you’re working on everyday projects or building up to more complex makes, a well-maintained machine will always give you better results.
Need supplies or advice? Visit Franklins for trusted tools, Schmetz needles, and everything you need to keep your sewing machine in top condition.