
Opening a sewing pattern for the first time can feel confusing. There are symbols you have never seen before, pages of instructions, and thin paper pieces covered in lines and markings. Many beginners assume they are missing something obvious, when in reality pattern reading is a skill that takes a little explanation and practice. Once the basics are clear, patterns become far easier to follow and far less intimidating.
Learning how to read a sewing pattern gives you far more freedom with your sewing. You can choose styles you enjoy, adjust the fit, and understand how a garment comes together before you even cut the fabric. In this guide, we will break down each part of a sewing pattern step by step, explain the most important terms and symbols, and highlight common mistakes to avoid so you can approach your first pattern with confidence.
What a Sewing Pattern Actually Includes
Before you even think about cutting fabric, it helps to understand what you are holding in your hands. A sewing pattern is a small system, with each part giving you information at a different stage of the process.
The Pattern Envelope and Why It Matters
The envelope tells you whether the pattern is suitable for you and your project.
On the front, you’ll usually see illustrations or photos of the finished garment. These show different views, such as sleeve options or neckline variations. It’s easy to focus only on these, but the back of the envelope is where the practical details live.
Here you’ll find:
- A body measurement chart to help you choose the correct pattern size.
- Fabric suggestions that indicate suitable fabric types and weights.
- A list of required notions, such as zips, buttons, elastic, or interfacing.
- Fabric yardage charts based on fabric width and garment view.
Pattern sizing is one of the first surprises for beginners. Pattern sizes are not the same as shop-bought clothing sizes, so relying on your usual size often leads to poor fit. The measurement chart is far more reliable.
What’s Inside the Envelope
Once opened, you’ll usually find two main components.
The first is the tissue paper pattern pieces. These are thin and covered with lines, arrows, symbols, and text. Each piece represents a section of the garment, such as a sleeve, bodice, or collar. They are delicate, but that’s normal.
The second is the instruction sheet. This is your roadmap. It includes:
- A key showing each pattern piece and its number.
- Cutting layout diagrams for different fabric widths.
- Step-by-step sewing instructions, often with simple illustrations.
How to Choose the Correct Size Before You Start
Choosing the right size is one of the most important steps when working with a sewing pattern. It sets the foundation for how the finished garment will fit, and it’s also where many beginners go wrong.
Using Body Measurements Instead of Clothing Size
Sewing patterns rely on body measurements, not the size printed on your ready-to-wear clothes. This can feel surprising at first. Pattern sizes often run differently, so it’s common to be a different number than expected.
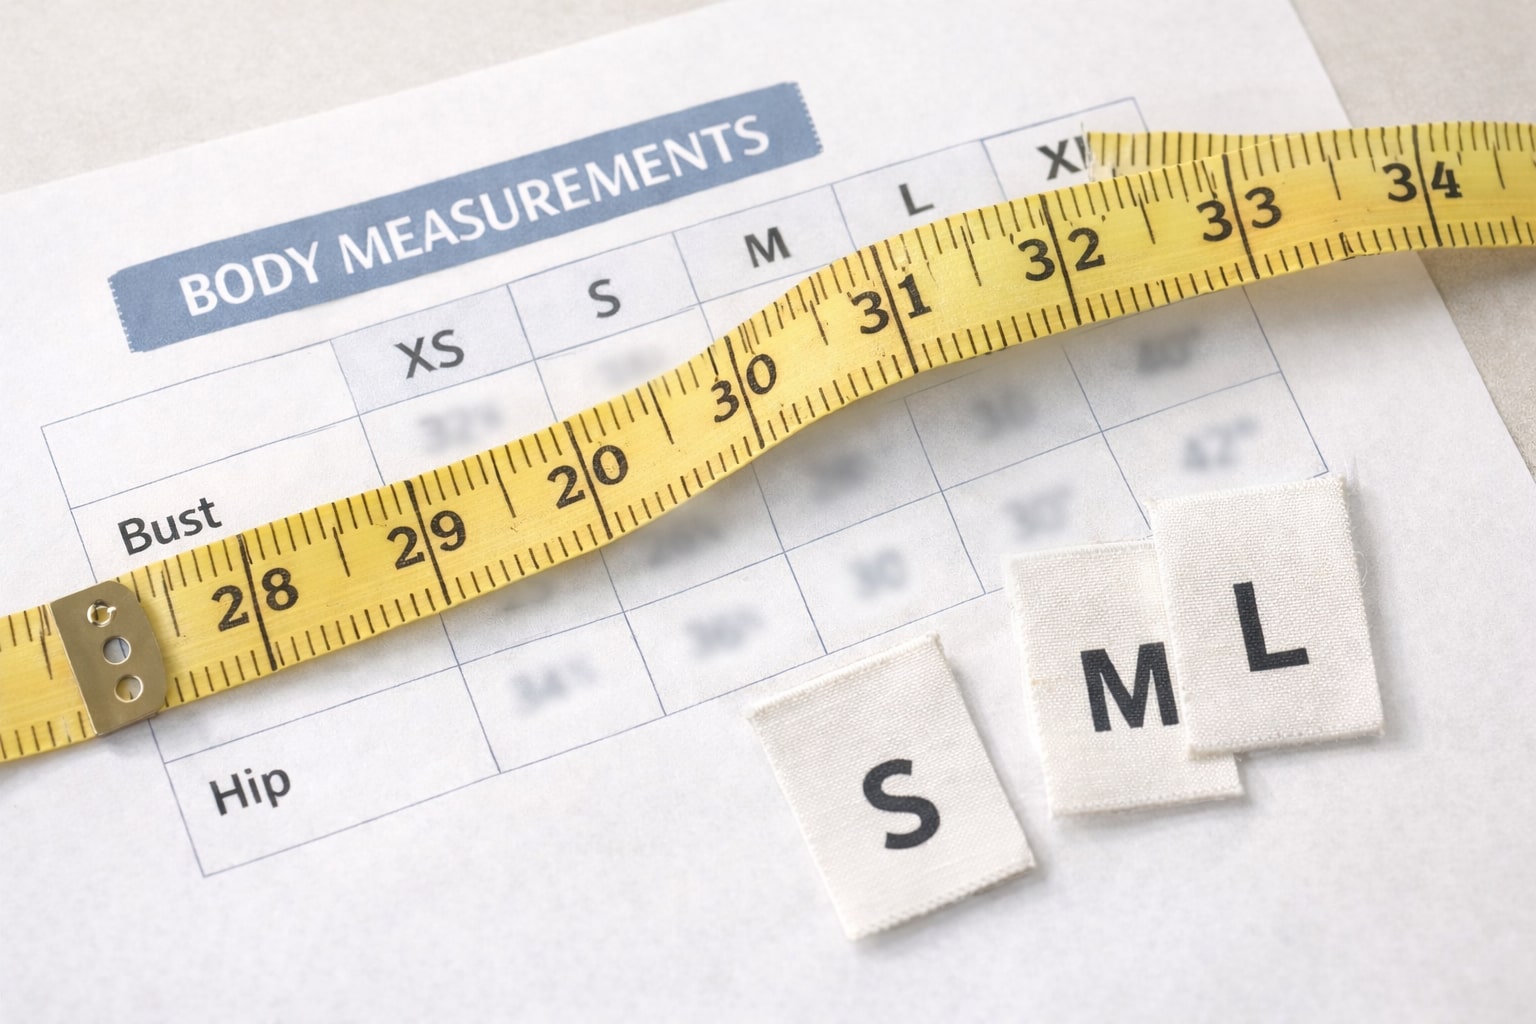
Sewing patterns rely on body measurements, not shop sizes
Take accurate measurements of your bust, waist, and hips. Use a flexible tape and measure snugly, not tightly. Compare your measurements directly with the chart on the back of the pattern envelope. If your measurements fall into different sizes, that’s normal.
When Measurements Fall Between Sizes
Bodies are rarely one standard size from top to bottom. If your bust, waist, and hips point to different sizes, choose the size that matches the area most important to the garment’s fit. For a dress, this is often the bust. For trousers or skirts, the hips usually matter most.
Some patterns also include finished garment measurements. These show how much ease is built in. A garment may be designed to sit close to the body or hang loosely. Checking these numbers helps avoid garments that feel too tight or unexpectedly oversized.
Understanding Fabric and Notion Requirements
Fabric choice plays a bigger role than many beginners expect. We often see new sewists struggle not because of the pattern, but because the fabric behaves very differently from what the design expects. Patterns are written with specific materials in mind, and following those suggestions makes learning far smoother.
Fabric Recommendations and Why They Matter
Every pattern lists recommended fabric types based on how the garment is meant to hang, stretch, and move.
Lightweight cottons, linen blends, or stable woven fabrics are usually suggested for beginner patterns because they cut cleanly, press well, and stay predictable under the needle. Ignoring these recommendations can turn a simple project into a difficult one. A flowing dress pattern sewn in stiff fabric may feel bulky. A tailored design made in slippery fabric can distort before you finish the seams.
If you are unsure, a good rule is to choose a fabric with a similar weight and structure to the examples shown on the envelope.
Fabric Width and Yardage
Patterns also specify how much fabric you need, based on width. Most charts list amounts for 45-inch and 60-inch wide fabrics.
This matters more than it seems. A narrower fabric requires more length to fit all the pattern pieces. Buying the correct yardage prevents awkward re-cutting or missing pieces halfway through the project.
Before buying fabric:
- Check the width on the bolt.
- Match it to the yardage chart for your size and chosen view.
- Add a little extra if the fabric has nap, a directional print, or if you are still learning.
Notions and Additional Materials
Notions are the supporting items that make the garment work. They are often listed clearly on the envelope back or instruction sheet.
Common examples include:
- Zips or buttons for closures.
- Elastic for waistbands.
- Interfacing for collars, cuffs, or facings.
- Matching thread in suitable weight.
Pattern Symbols and Terminology You Need to Recognise
This is the point where many beginners feel lost. Pattern pieces are covered in lines, arrows, triangles, dots, and small blocks of text. The good news is that these symbols are consistent across most patterns, and once you understand them, they start to feel helpful rather than confusing.
Grainline and Fabric Direction
The grainline is one of the most important markings on any pattern piece. It usually appears as a long arrow printed through the centre of the piece.

Correct grain alignment prevents twisting and poor drape
That arrow must run parallel to the fabric’s selvage. When it doesn’t, the garment can twist, stretch, or hang unevenly once worn. This is one of the most common issues we see when customers bring in garments that “don’t sit right”. The stitching may be neat, but the fabric was cut off-grain.
Notches, Dots, and Other Markings
Notches are small triangles or lines cut into the edge of a pattern piece.
Single notches might mark the front of a sleeve. Double notches often indicate the back. Matching notches during sewing ensures pieces join in the correct orientation and prevents accidental twisting.
Dots and small circles usually mark:
- Dart points
- Pleat placement
- Pocket or trim positions
Fold Lines and Cutting Instructions
Some pattern pieces are designed to be placed on the fabric fold. These will be clearly marked with a fold line instead of a cutting line.
This means the fabric is folded, the pattern piece is placed along the fold, and you cut around the remaining edges. When unfolded, you get a perfectly symmetrical piece.
You’ll also see instructions such as “Cut 1” or “Cut 2”. This tells you how many pieces to cut, not how many layers of fabric to use. It sounds obvious, but it’s an easy detail to misread early on.
Seam Allowance
Most commercial patterns include seam allowance within the cutting line. The amount is usually stated near the beginning of the instructions.
Common allowances include 1.5 cm or 5/8 inch. Whatever the pattern specifies, consistency matters more than speed. Sewing slightly inside or outside the allowance can change the fit across the entire garment.
Preparing and Cutting Your Fabric Correctly
This stage often feels slow, especially when you are keen to start sewing. It is also where many problems are either prevented or created. Taking time here pays off later.
Preparing the Fabric Before Cutting
Most fabrics change slightly the first time they are washed. That’s why pre-washing matters. Wash and dry your fabric the same way you plan to care for the finished garment. This helps prevent shrinkage or colour bleeding after all your work is done.
Once dry, press the fabric flat. Creases and wrinkles can throw off your cutting accuracy. A smooth surface makes it easier to place pattern pieces correctly and line up grainlines without guesswork.
Using the Cutting Layout Diagram
Every pattern includes a cutting layout diagram. It shows how the pattern pieces fit onto the fabric for different widths and views.
These diagrams are not strict rules, but they are very good guides, especially for beginners.
They help you:
- Use fabric efficiently
- Keep grainlines aligned
- Avoid placing pieces upside down on directional prints
Cutting and Marking the Fabric
Cut slowly and deliberately. Follow the cutting line for your chosen size, not the outermost line unless that is the correct one. If the pattern includes multiple sizes, tracing your size instead of cutting the tissue can be helpful, especially if you plan to reuse the pattern.
Once cut, transfer all important markings to the fabric. This includes notches, dots, darts, and fold indicators. Chalk, washable pens, or tailor’s tacks all work. What matters is that the markings are clear and accurate.
Building Confidence With Every Pattern
Reading a sewing pattern for the first time can feel like learning a new language, but it becomes far less intimidating once you understand how each part works together. From choosing the correct size to recognising symbols and preparing fabric properly, every step plays a role in how successful the final garment will be. Taking your time at the beginning often leads to faster, smoother sewing later on, with fewer mistakes to undo.
We see time and again that beginners who slow down, read carefully, and prepare thoroughly enjoy the process far more. Patterns are not tests of skill. They are guides. With practice, they become familiar and surprisingly reassuring. If you ever feel unsure, starting with simple designs and stable fabrics makes all the difference. You can also explore patterns, tools, and sewing essentials at Franklins to support your next project with confidence.
Key Takeaways
- Always choose your pattern size using body measurements, not clothing size labels.
- Read the entire pattern envelope and instruction sheet before cutting any fabric.
- Follow fabric and notion recommendations to avoid unnecessary difficulty.
- Take time to understand symbols such as grainlines, notches, and seam allowances.
- Prepare, press, and mark your fabric carefully before sewing.
- Treat patterns as step-by-step guides rather than rigid rules.